• Flight Controller Shield for an Arduino Mega

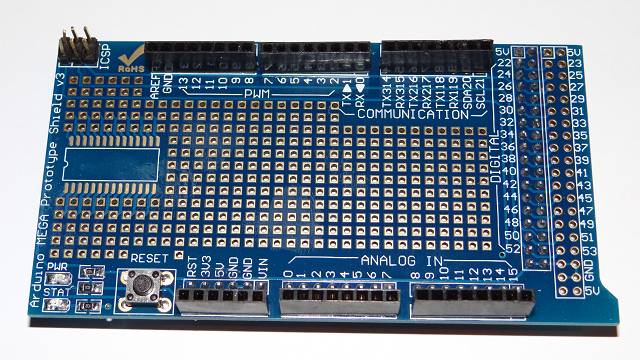
    Here is part 3 of my homemade quadcopter series. I`m making the flight controller shield with a protoshield and the 10 dof IMU the GY-80. It would be easier to buy a complete flight controller with integrated IMU, but I already have the Sainsmart Mega and the IMU and I know how they work and that they work, so I decided to use them. The advantage of making a shield is that I can try different IMUs if I want, and it`s easy to add other components like LEDs or ultrasonic senosrs to the pins of the Arduino Mega. The disadvantage is the higher weight and the time that it takes to make the shield.
    In the last part of the video I test it with the Multiwii software.


  • Featured Image Quadcopter Multiwii Settings for an Arduino Mega with IMU

    The multiwii code is very large and can be quiet overwhelming at the beginning(at least for me it was), but once you know that all the important settings are made on the config.h tab it becomes more overseeable. In the following I show the settings that I have chosen so far. Here is the video in which I tested them: http://youtu.be/ad5JCKX0C40
    I can`t guarantee that the quadcopter will fly with them, because I didn`t try it yet. When I change something I will update this page.

    (Click on the pictures to enlarge them.)


    Continue reading  Post ID 312


  • Arduino Mega Protoshield Review

    This is a protoshield(short for prototype shield) for an Arduino Mega. They are sold for around 3 Euro and in my opinion it`s worth it compared to the afford it takes to make a shield like this by myself. All the pins, the two leds and the reset button are brought to the top and labelled correctly.  In the middle is a lot of room to solder electronic components onto it. In my case I want to solder a 10 degree of freedom IMU and some headers onto it and use it as a flight controller shield for my quadcopter.

    link to the protoshield: Ebay – Arduino Mega Protoshield

    Protoshield

    Continue reading  Post ID 252


  • Homemade Quadcopter – part 2: Making the Frame [How to]

    Here is the video of how I made my quadcopter frame. It consists of 4mm laminated birch wood for the centerplates and 10mm Aluminium square pipes for the arms. With 240g it won`t win the price for the lightest frame, but it is stable, relatively simple to make and it is possible to upgrade to stronger motors in the future.


  • What you can expect to see on the Experimentaltechnik channel and Website

    It was about time that I made this informational video about the projects and videos that I plan to make/upload. It is also the channel trailer that potential new subscribers will see when they visit my youtube channel`s frontpage that I just configured. On this website I will post additional information to the videos, and things that are better described with text and pictures rather than with videos.


  • Motor powered, Remote controlled Gyroscope Experiment

    Here a video about an experiment with the gyroscopic effect that I made. I find gyroscopes very interesting and wanted to make an experiment about them myself. I thought it would be practical to have a motor powered version, so that it keeps the same rotational speed all the time and can be remote controlled.
    It is working, but there are some practical design flaws that I adress in this video. I uploadet it a while ago and almost forgot to post it on my website.


  • Homemade Quadcopter – part 1: Project Start

    So I finally have all the important parts together and can build my quadrocopter. Here is the first video in which I give an overview about them and explain the basic concept. There will be more, in the next video I will show how I make the frame.


  • Problems over Problems…

    I didn`t make a video for a month because nothing I planned worked. At first I had to change the code of the rotational speed sensor because of a mathematical error. Now it does work, but not for low velocities and I still don`t know where the mistake in the code is.

    Then I wanted to make a review of a cheap DC-DC converter but it never got delivered. I got my money back from paypal though.

    Another video I wanted to record outside didn`t work because appearently the microphone in the camera recorded everything louder than my voice: cars, airplanes, insects, undefined background noice,…
    And I don`t want to upload bad quality.
    Thats why I bought a seperate audio recorder, the Zoom H1. You can hear it in my newest video: Homemade Quadcopter – part 1: Project Start, the quality is much better than the internal camera microphone that I used for my videos before.

    With some other videos that I wanted to make instead of my planned ones, I had problems as well. So all in all it was a relative unfortunate time and I think I should produce some videos in advance to have a backup in case this happens again. Even though I only have a handfull subscribers at the moment I want to regulary upload videos. Now that I think about it, I don`t even know if anyone of them reads this. Greetings to you if you do!


  • Featured Image My next project: Making a Rotational Speed Sensor

    I want to make an universal useable rotational speed sensor device. My first experiments with an infrared LED and an infrared diode which can be seen in the picture were promising. I could measure the RPM of a brushless motor and also of a propeller, just by the difference of reflections of the IR Led on the motor or propeller that got recognized by the IR diode. The Arduino code is already finished. The circuit is very simple, I didn`t even need an OpAmp.
    A video about this project will come in the next days, but before I make that, I will solder everything together nicely and add a LCD to show the rotational speed.